Social Design Display Mockup for Fabrica
If you have ever tried to present a design concept to a client, posted a new social media template on a marketplace, or simply wanted to show your work in a polished, professional light, you already know how much the presentation matters. A strong display mockup can elevate a decent design into something that feels ready for the real world. The Social Design Display Mockup for Fabrica is one such tool that has been gaining traction among creators, marketers, and entrepreneurs alike. But like any asset, it works best when you understand what it actually offers and where people tend to go wrong with it.
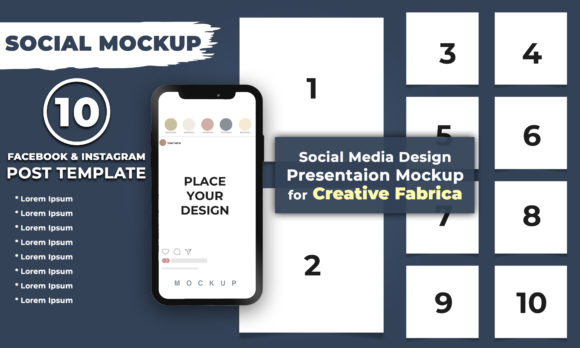
This mockup is essentially a layered Photoshop file that lets you place your own design into a realistic, staged environment. It comes with a generous canvas size of 4000 x 2500 pixels, which means your work stays crisp even when viewed on large screens or printed. It includes a single PSD file, a TIFF file, and a JPEG preview. The font used is Montserrat, and everything is organized into well-structured layers with smart objects. If you have used mockups before, you know that smart objects are the gold standard for quick, non-destructive edits. If you are new to them, they simply mean you double-click, paste your design, save, and the mockup updates automatically. No manual resizing, no distortion, no guesswork.
What makes this particular mockup interesting is its versatility. It is designed for Fabrica, but it can also be used for other stock marketplaces. That means if you create assets for Creative Fabrica or similar platforms, you can repurpose this same mockup to showcase your work in a consistent, branded way. It saves time, maintains visual coherence, and helps you avoid the awkward mismatch of using different presentation styles for different stores.
Why people get drawn to this mockup and what they overlook
Many creators come to this mockup because they see it as a quick fix for presentation problems. And in many ways, it is. But the most common mistake people make is treating it as a magic wand that will automatically make their design look good. A mockup is only as strong as the design you place inside it. If your artwork is poorly aligned, uses low-resolution elements, or lacks visual balance, no amount of realistic shadowing or smart object convenience will save it. The mockup amplifies what is already there. It does not replace thoughtful design work.
Another overlooked detail is the file format confusion. The set includes a PSD, a TIFF, and a JPEG. Some beginners mistake the JPEG as the editable file and try to paste their design onto it. That will not work. The JPEG is purely a preview or a quick reference. The TIFF is a high-quality alternative to PSD, useful if you work across different software or need to preserve layers with maximum compatibility. But the real editable file is the PSD, and it requires Adobe Photoshop CC. If you are using an older version or a different program entirely, you may run into layer compatibility issues or lose the smart object functionality. Always check your software version before downloading.
There is also a subtle but persistent misunderstanding about the canvas size. 4000 x 2500 pixels is generous, but it is not infinitely scalable. If you try to stretch your design to fill the entire canvas without considering the original proportions, you may end up with distortion or awkward cropping around the edges. The smart object inside the mockup has its own boundaries. You need to place your design within those boundaries, not force it to fill the whole canvas. The canvas exists to give you room to work, add text, include branding, or create a composition around the mockup itself. Treat the canvas as your workspace, not as the final crop.
How these mistakes affect your results and your reputation
When you present a design that looks stretched, misaligned, or poorly composed inside a mockup, viewers notice. They may not articulate it, but they sense that something feels off. For a client, that can erode trust in your skills. For a marketplace listing, it can mean fewer downloads or sales. For your own portfolio, it can make otherwise strong work look amateurish. The mockup is meant to enhance your design, not to cover up its flaws. If you rely on the mockup to do the heavy lifting, you will end up with results that feel hollow or generic.
Another real cost is wasted time. If you download the mockup without reading the file structure, you may spend hours trying to edit the wrong layer or struggling to make your design fit. That frustration can lead to rushed decisions, like settling for a poor placement or abandoning the mockup altogether. The solution is not to avoid mockups, but to approach them with a clear understanding of how they work and what they expect from you.
Practical advice for getting the most out of this mockup
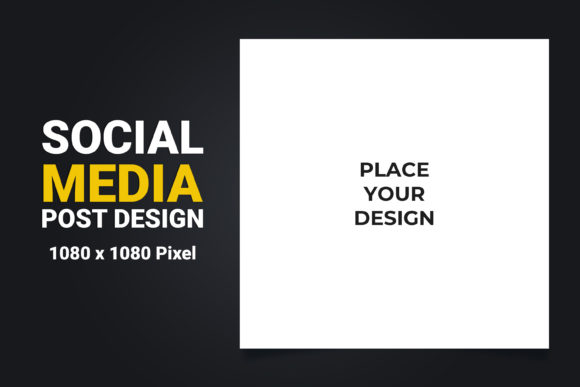
Start by opening the PSD file and familiarizing yourself with the layer structure. The mockup is described as well layered and organized, which means you should see folders or groups that label each element. Look for the smart object layer. It is usually named something like "Your Design Here" or "Place Your Design." In this mockup, there is no placeholder text that says "Your Design Here," so you need to identify the correct smart object by its thumbnail or by turning visibility on and off. Once you find it, double-click its thumbnail. A new window opens. Paste or place your design there, resize it to fit, save, and close. The mockup updates automatically.
Because there is no explicit placeholder label, beginners sometimes miss the smart object entirely and try to edit the background or a shadow layer instead. That leads to confusion and wasted effort. If you cannot find the right layer, look for the smart object icon (a small page with a folded corner) or check the layer style. Smart objects have a special badge in the layers panel. If you are still unsure, duplicate the file and experiment. Trial and error with a copy is harmless and can teach you more than reading a manual ever will.
When placing your design, pay attention to perspective, lighting, and shadows. The mockup already includes realistic environmental lighting. Your design should match that lighting direction and intensity as closely as possible. If your design has a flat, uniform brightness but the mockup shows a soft shadow falling from the upper left, the mismatch will be visible. You can adjust your design slightly by adding a subtle gradient or shadow before placing it, or by using a soft adjustment layer in the smart object itself.
Also, consider the font. The mockup uses Montserrat, which is a clean, modern sans-serif typeface. If your design includes text, decide whether you want to match that style or intentionally contrast it. Montserrat works well for headlines, labels, and minimalist branding. If your design uses a decorative or script font, make sure it does not clash with the overall tone of the mockup. The mockup is neutral enough to accommodate many styles, but extreme contrasts can look jarring.
What to check before you buy or download
Before you commit to any mockup, verify that your software can handle it. This file requires Adobe Photoshop CC. If you are using Photoshop CS6 or earlier, you may still be able to open it, but smart objects created in newer versions may not behave the same way. If you are using an alternative like GIMP, Affinity Photo, or Pixelmator, the PSD may open with limited layer support. In those cases, the TIFF file might be a better option, but you will lose the smart object convenience. Know your tools before you download.
Check the dimensions and aspect ratio of the canvas. At 4000 x 2500 pixels, the aspect ratio is 16:10, which is slightly wider than standard 16:9. This is great for social media banners, website headers, or print presentations. But if you need a square or portrait orientation, this mockup may not be ideal without cropping. Plan your layout around the available space. You can always add your own background elements within the canvas to create a custom composition, but the core device or display area is fixed.
Consider how you will use the included files. The JPEG is useful for quick previews or for uploading to platforms that only accept static images. The TIFF is a high-quality fallback if you need to work in a non-Photoshop environment or if you want a lossless format for printing. The PSD is your primary editing file. Keep all three organized in a folder so you always have options. Some marketplaces allow you to upload a ZIP with multiple file types, which can be a nice bonus for buyers who may not have Photoshop.
A better approach to using mockups for multiple marketplaces
One of the strongest features of this mockup is its reusability across different stock markets. If you sell on Fabrica, Creative Fabrica, or similar platforms, you can use the same mockup to maintain a consistent brand identity. But consistency does not mean monotony. You can vary the background color, add subtle overlays, or change the surrounding props while keeping the core display area identical. That way, your portfolio looks cohesive without feeling repetitive.
A practical workflow is to create a master PSD file where you keep the mockup as a smart object, and then duplicate it for each design you want to showcase. Inside each duplicate, replace only the smart object content. This preserves the original file and lets you batch-produce multiple presentations quickly. If you need to present variations of the same design, you can even create a single PSD with multiple smart objects, each pointing to a different design file. That level of organization saves time and reduces errors.
What makes this mockup stand out in a crowded market
There are thousands of mockups available online, but many suffer from the same problems: overly cluttered scenes, low-resolution textures, or confusing layer structures. This mockup avoids those pitfalls by keeping the scene clean and the file structure straightforward. The use of Montserrat as the editable font also indicates that the creator paid attention to typography quality. Montserrat is free, widely available, and looks professional in both web and print contexts. If you need to edit the text layer, you will need to have Montserrat installed on your system. If you do not, the layer will default to a fallback font, which may break your layout. Download and install Montserrat before you start editing.
The absence of "Your Design Here" placeholder text is a deliberate choice that could be polarizing. Some users prefer clear labels, especially if they are new to Photoshop. Others appreciate a cleaner workspace without visual clutter. If you find yourself searching for the right layer, remember that the smart object is still there. It just does not announce itself with text. Look for the thumbnail that shows a generic shape or the device frame itself. That is where your design goes.
A final word on using mockups to build trust with your audience
Mockups are not just decoration. They are a form of communication. When you present your work inside a realistic environment, you are telling your audience that you value professionalism, attention to detail, and the end-user experience. A sloppy presentation can undermine even the most brilliant design. A thoughtful one can make a simple design feel premium. The Social Design Display Mockup for Fabrica gives you the tools to create that premium feeling, but it still requires your judgment, your eye, and your willingness to learn the software.
If you are new to mockups, start with this one. Its clean layout, generous canvas size, and smart object workflow will teach you good habits that apply to almost any other mockup you encounter later. If you are experienced, use it as a reliable baseline that you can customize and repurpose without reinventing the wheel every time. Either way, the most important thing is to avoid the common shortcuts that lead to mediocre results. Take the time to understand the file, align your design with the scene, and present your work in a way that respects both your effort and your audience's attention.
That is the difference between a mockup that merely displays a design and one that truly sells it.